Whether you’re working on a large project or a small one, visualizing the behavior of system components can feel overwhelming. That’s where the class diagrams come into play, offering a clear visual representation of system components and their interaction. The class diagram allows you to effectively explain how the classes, attributes, and relationships are organized in an object-oriented system.
This post will walk you through the class diagram, briefly explaining what it is, why to use it, and how to create it.
Let’s begin by explaining what a class diagram actually is.
What is a Class Diagram?
A Class diagram is a type of static structure diagram in the UML (Unified Modeling Language) that represents the system structure by showing the classes, attributes, methods, and relationships. Class diagrams are crucial when you’re designing object-oriented software systems.
5 Key Reasons to Use A Class Diagram
Now that you have a clear overview of the class diagram. It’s time to explore the key reasons to use the class diagram,
Visualizing System Structure
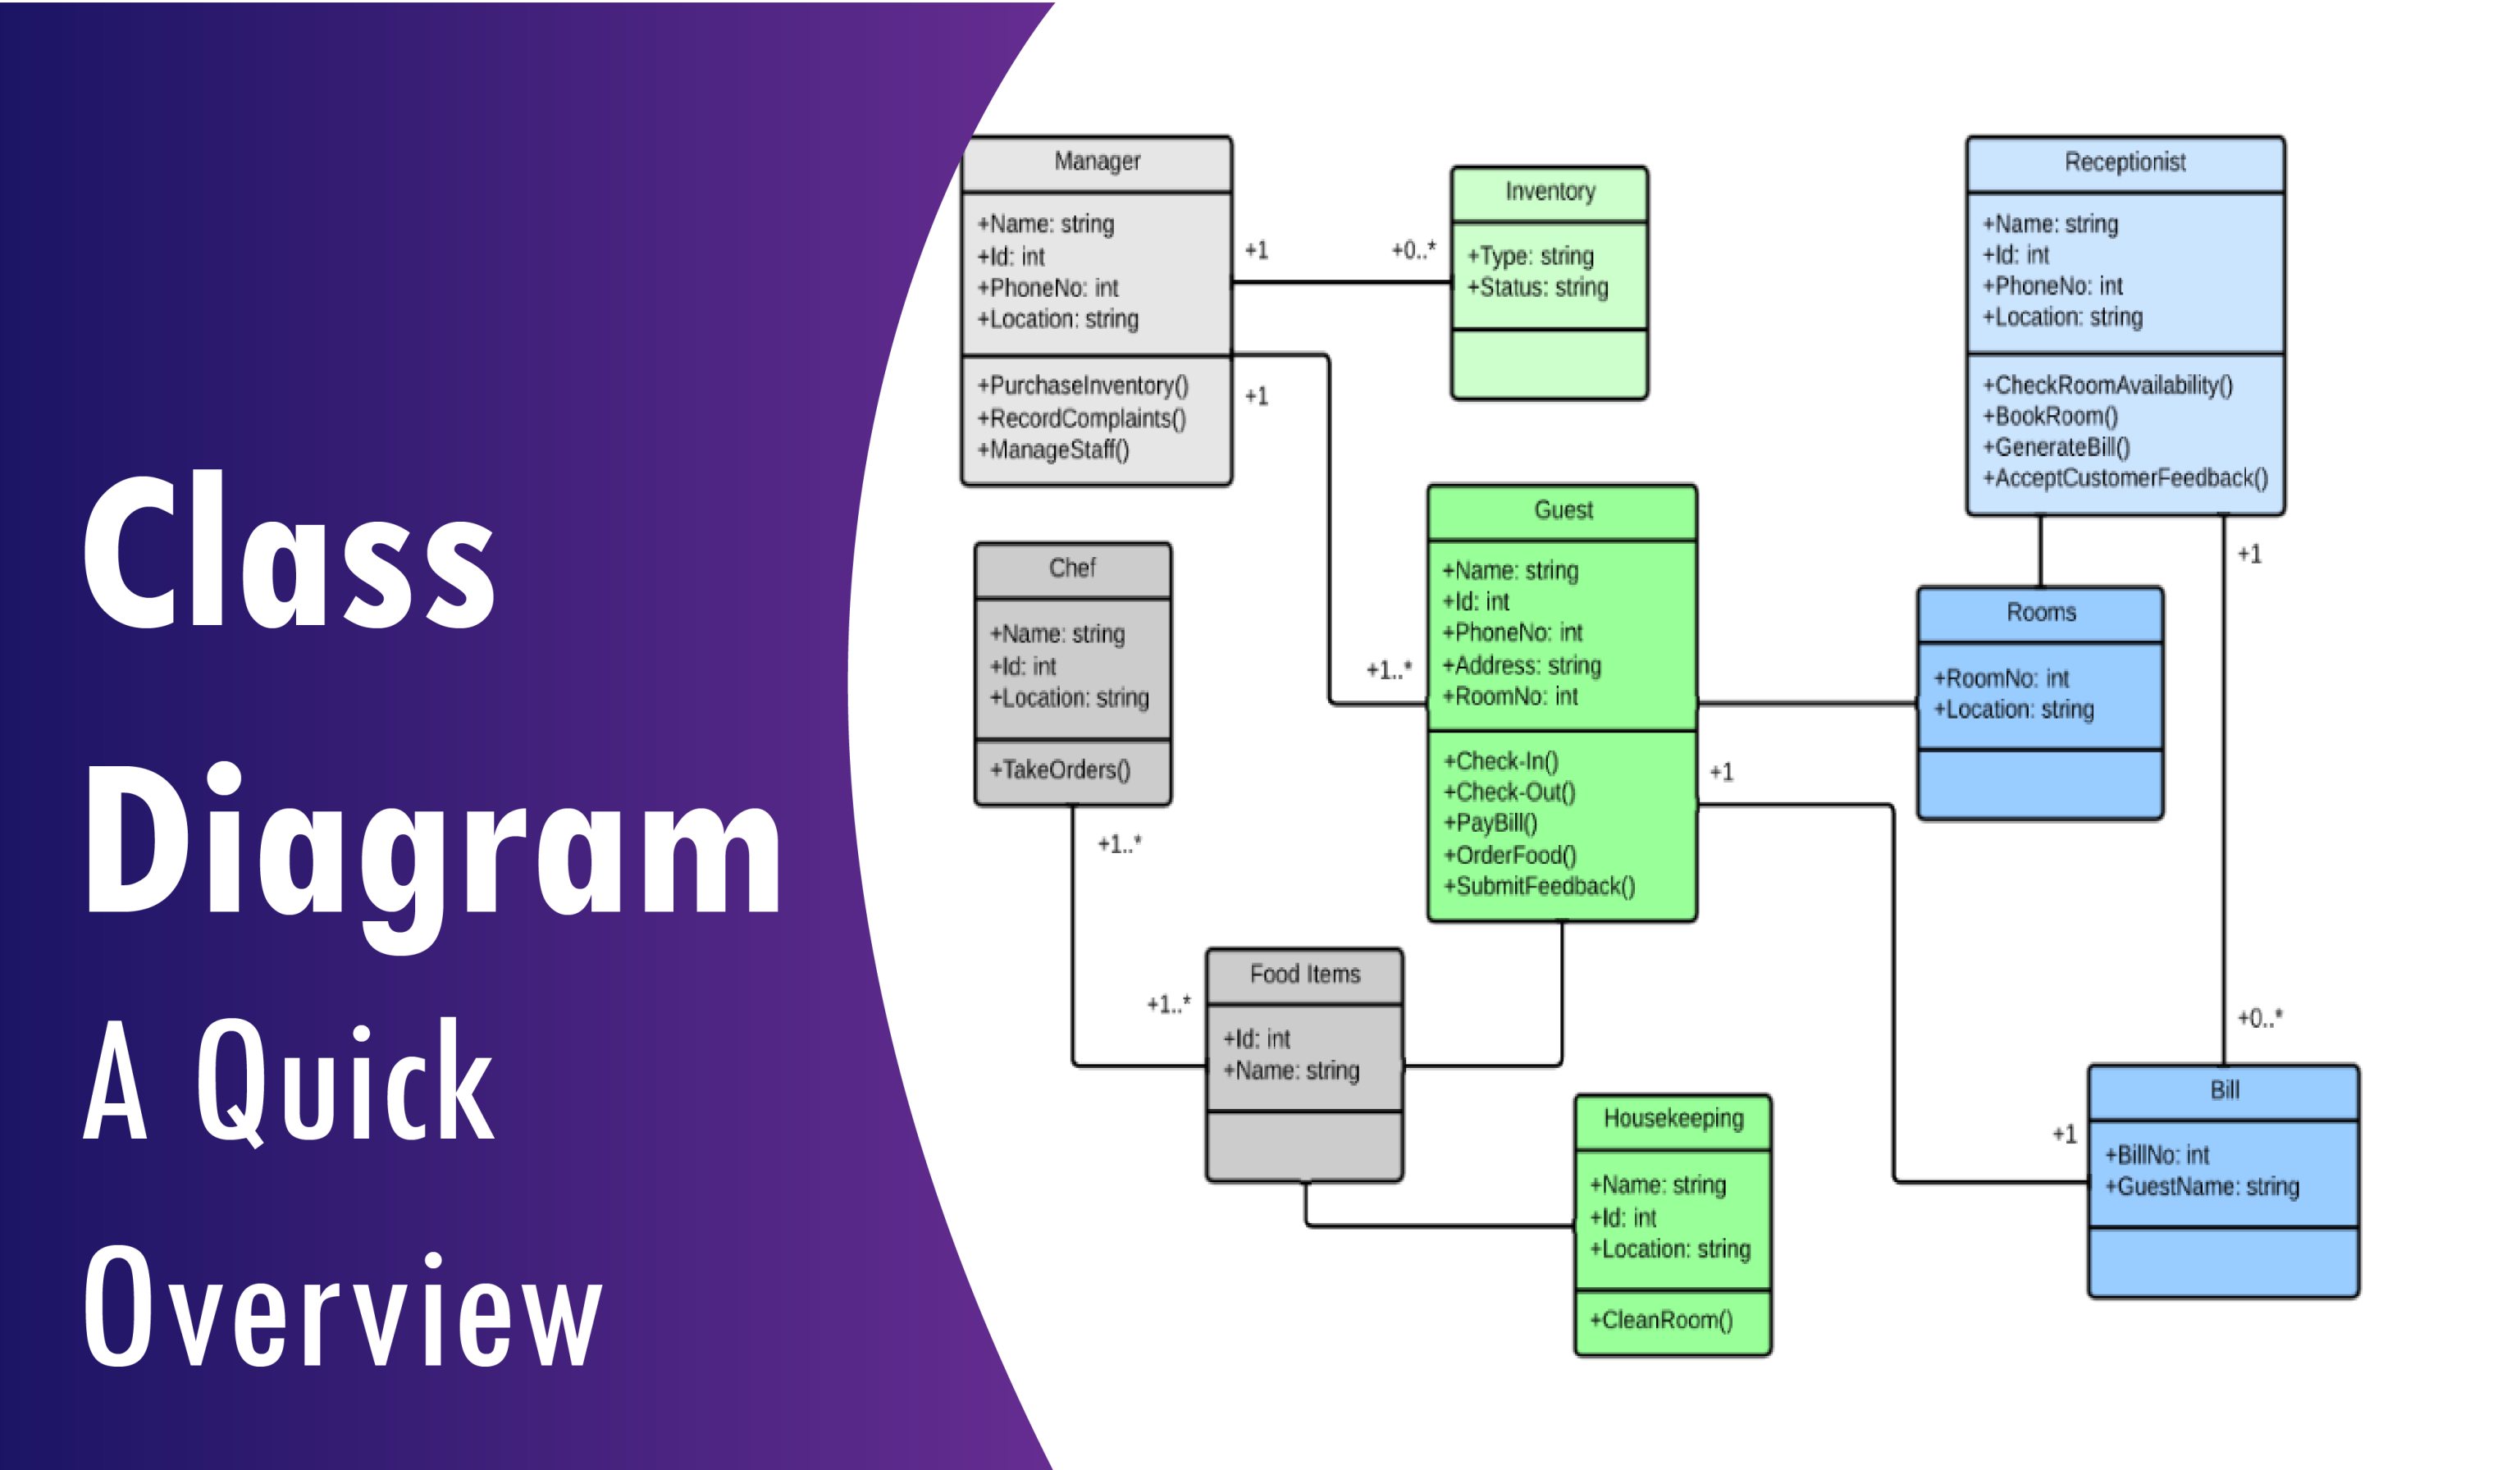
The class diagram provides a crystal-clear view of the system, representing the system components like classes, attributes, and relationships. This helps developers and stakeholders to understand how the system components are connected and interact.
Clarifying Component Relationships
The class diagram clearly demonstrates the relationships (e.g., inheritance, association, or dependency) between classes. This helps to clarify class responsibilities and behavior and discusses the data movement among objects and variables.
Clear communication
The class diagram allows you to explain the system’s structure without going into the details of the code, making it easy for everyone to understand the core concept. This helps you share complex ideas between developers, designers, and non-technical stakeholders.
Planning and Design
Class diagram used early in the development process, and allows you to plan object-oriented structure, and identify and resolve potential design errors before the coding phase starts.
Documentation
The class diagram is the key to the system’s documentation, allowing you to provide a high-level view of the system structure, ensuring consistency between the design and implementation, and making onboarding new team members smoother.
10 Common Steps to Craft an Effective Class Diagram?
At this point you have a clear insight into the class diagram and observed why it’s so important Now, let’s explore the steps for designing an effective class diagram:
Step 1: Identify the Requirements
This is the initial step, where you review the project requirements, use cases, and user stories to understand the core system’s functionality. Identifying the main objects and entities of the system is a crucial task for this step.
Step 2: Identify Classes
In this step you’ll determine the role of each class, finding potential classes for the system. For example, if you’re working on a library management system, the potential classes might include Book, Members, Library, etc.
Step 3: Define Class Attributes
For each class, define the attributes and describe their purposes. You also need to define the data types for each attribute, such as strings, booleans, integers, etc.
Step 4: Define Class Methods
Your task in this step is to determine the behavior of each class, ensuring that each class is responsible for its own actions. These behaviors are represented as methods.
Step 5: Determining the relationships
Now define the relationships between each class of the system. These relationships can be of different types such as aggregation, composition, inheritance, etc.
Step 6: Add Multiplicities and Cardinality
After defining the relationships, it’s time to specify the multiplicities that indicate how many instances of one class relate to another. Common multiplicities include 1, 0..1, *(many), and 1..*.
Step 7: Apply Access Modifier
In this step you need to define the access control for each attribute and method, ensuring proper encapsulation. The common access modifiers are public, private, or protected.
Step 8: Refine the Diagram
This step is for organizing the diagrams clearly by grouping the classes and separating the subsystems. It’s important to avoid unnecessary details that don’t provide any value.
Step 9: Use Class Diagram Tools
After you’ve done all the previous steps it’s time to visualize the diagram using diagram tools like Inno.navi, Visual Paradigm, or Draw.io. If you’re getting confused about which tools to use, this article may be helpful in this case.
Step 10: Review and Validate
Finally, review and validate the diagram, ensuring the class diagram represents the system structure correctly and follows the design principles.
Final Thoughts
Class diagrams do more than visualizing system structure. It lets you clearly describe each component of the system, reducing the confusion that often arises when designing complex systems that come with huge components and relationships.
However, a powerful diagramming tool is essential to design an effective class diagram that explains the system like a story. This article might be helpful to find the best tool for your team.
If you have any questions or need any further assistance, feel free to contact us. We’ll be happy to assist you.